
Table of Contents
Let’s fix the Chrome Memory Leak to reduce Memory usage to keep your computer working faster.
There is no second thought about Google Chrome being the go-to web browser for any current platform. If you take a particular android, you will find it pre-installed. While in the case of PCs, Macs, or even Linux-based systems, Google Chrome is one of the best user-friendly browsers.
Google chrome uses a lot of RAM to stabilize these speedy processes. It is a known fact that it utilizes so much ram that some PCs which come with less memory, like 4 or 2GB ram, often get lagged and sometimes even crash.
What is a memory leak & Why it happens?
The term memory leak refers to a range of problems associated with system communication that gradually reduces the available dynamic heap memory. RAM’s primary purpose is to reserve chunks or blocks of application heap memory that a program occupies for optimal use. 
Whenever you exit a program, these memory chunks need to be cleared for later use or reallocated to another running program that needs them.
However, leakage arises whenever an application fails to communicate this reserved memory, which results in many complications. In terms of Chrome, the leakage is generally associated with how many tabs you have currently opened that ultimately strain the system resources.
Multiple Methods to reduce Chrome Memory leaks
1, Manually remove or close tabs and extensions
One of the easiest ways to hamper additional chrome activity is by manually closing the unnecessary tabs or even extensions running in the background.
STEP 1: Open the Chrome Task manager and manage the memory usage
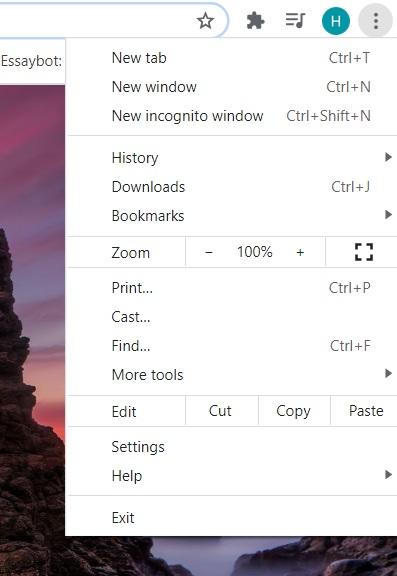
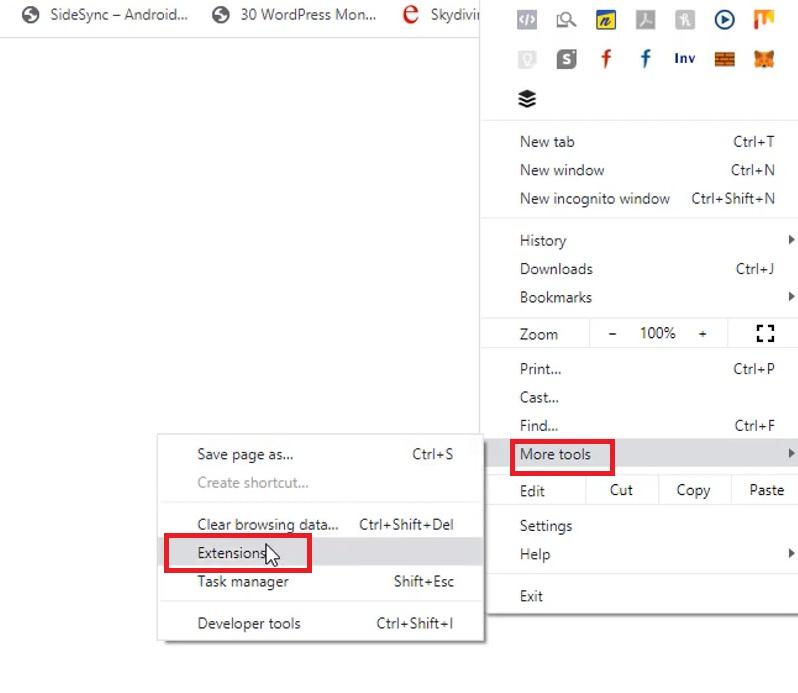
First of all, you need to analyze which background chrome process is consuming more than the acquired memory amount. To accomplish this, open your chrome browser and select the three dots located at the top right corner of your screen.
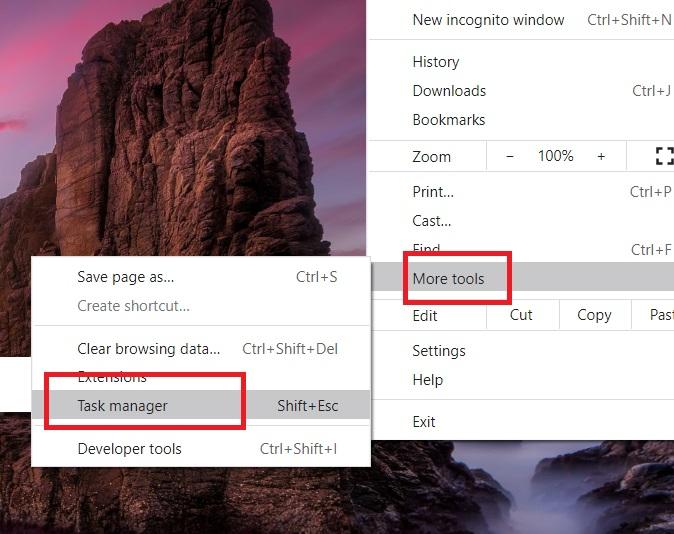
Now select “More tools” and then hover over to the “Task Manager” option and double-click it. You can also enter this option by typing the [Shift+Esc] key on your keyboard.
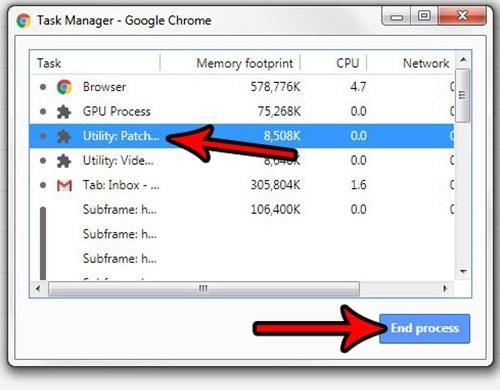
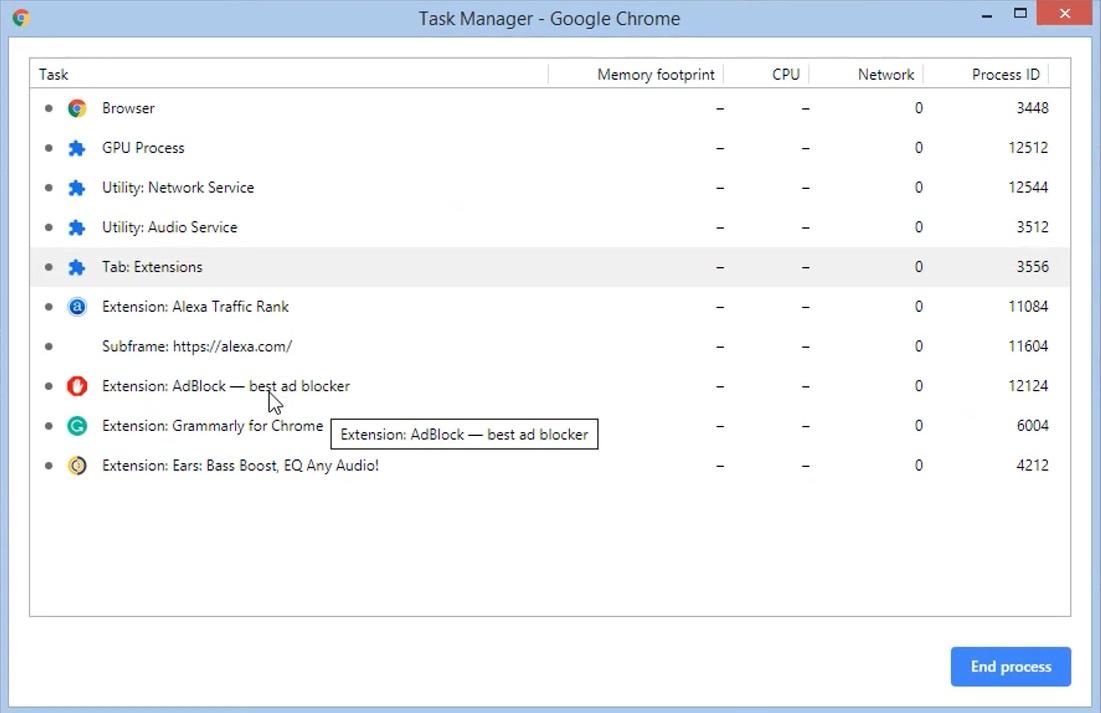
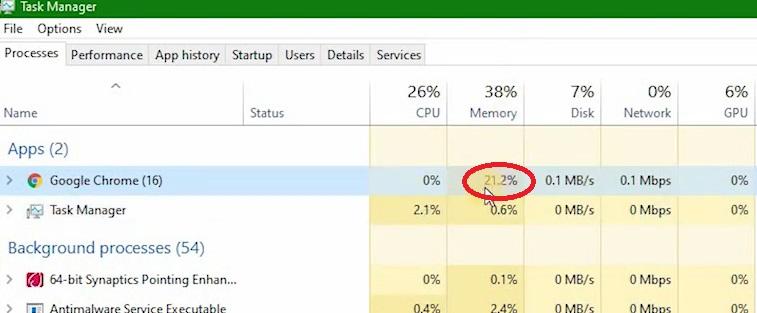
A new window will open in which you can see which one of your tabs is eating your maximum ram through the memory section. By default, Google Chrome will be present at the top of the list, so there is no need to mess with it.
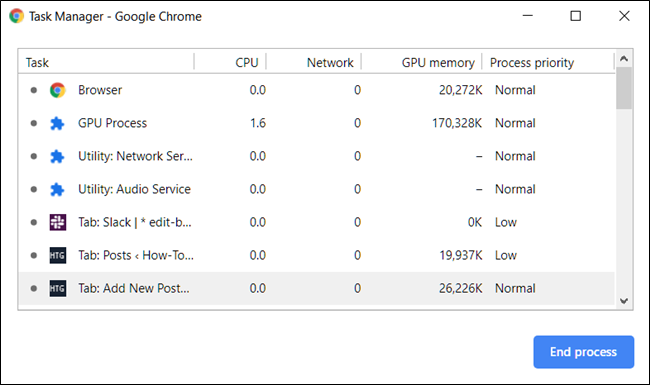
Simply select any static tab which you don’t need at the moment and click on “End Process” present at the bottom right corner.
STEP 2: Disable the unwanted extensions after checking the memory usage
After you have a general idea of which extensions on your Chrome browser utilize the maximum memory, the next logical step is to disable or altogether remove them.
For this, again move on to the three dots on Chrome, select “More tools,” and then “Extensions.”
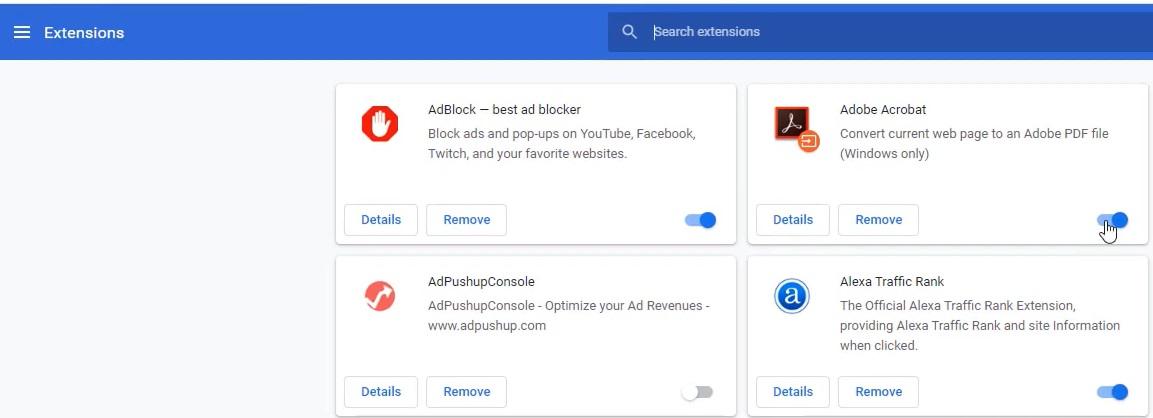
Another window will open. You need to disable the extensions that are driving your system memory—also, no need to worry as you can always enable important ones whenever you need to.
You can also remove them by clicking the “Remove” icon next to them if they aren’t in use.
Now open the Chrome Manager again and notice the results. Those ram-hungry processes won’t be there anymore, and you can again start browsing without any trouble!
Make respective changes in Chrome settings
If you’re still facing the google chrome memory leak 2020, it’s wise to set the Chrome settings for optimal performance. Following are some of the steps that you can take in this regard.
STEP 1: Enable hardware acceleration in the settings
Firstly, copy the following code chrome://about:memory, paste it in the URL section of Chrome, and hit Enter. In the following window, make sure that most of the graphical features are set to “Hardware accelerated.”

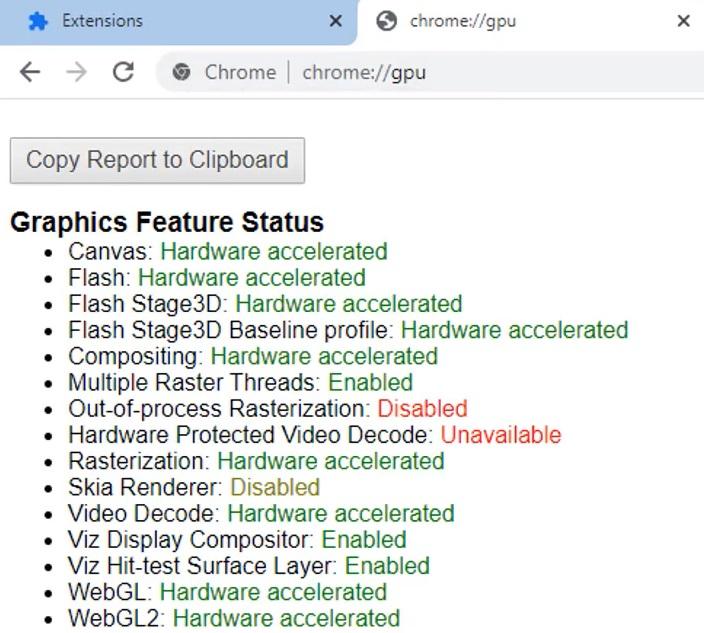
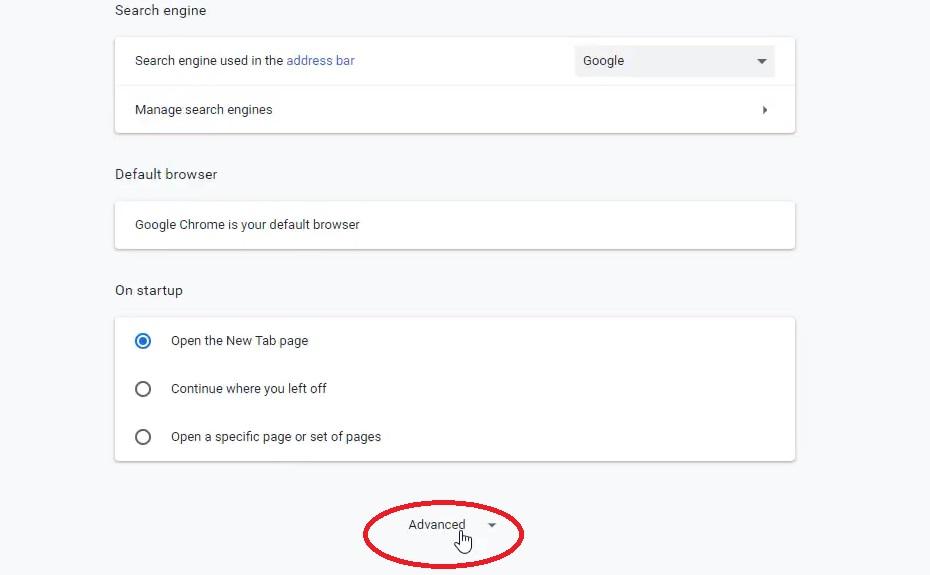
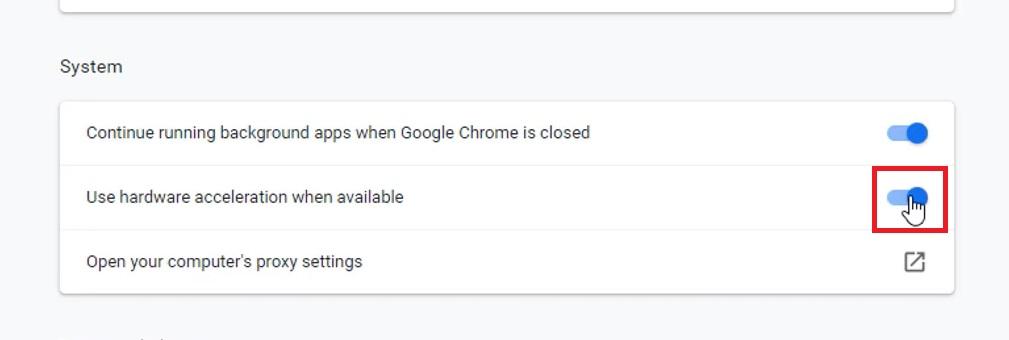
If somehow they aren’t enabled, go to “Settings” and scroll down at the bottom till you see the “Advanced” option and select it. After that, under the System section, right-click on hardware acceleration and enable the setup.
STEP 2: Disable Google Chrome from running in the background
Even if you close google chrome, there is a high probability that it might be running in the background, increasing the ram usage and reducing your system performance.
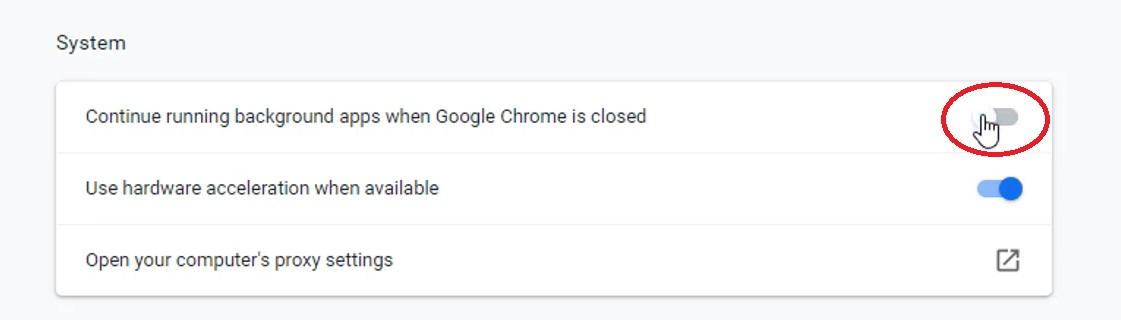
To disable its access in the background, move to Settings >Advanced and scroll at the lower section of the respective window.
Under the System menu, you will see an option termed as Continue running background applications when Google Chrome is closed. Make sure that this option is disabled as it can lead to increased system load.
After you deactivate this setting, check your task manager and praise the results!
STEP 3: Deactivate Preload page synchronization
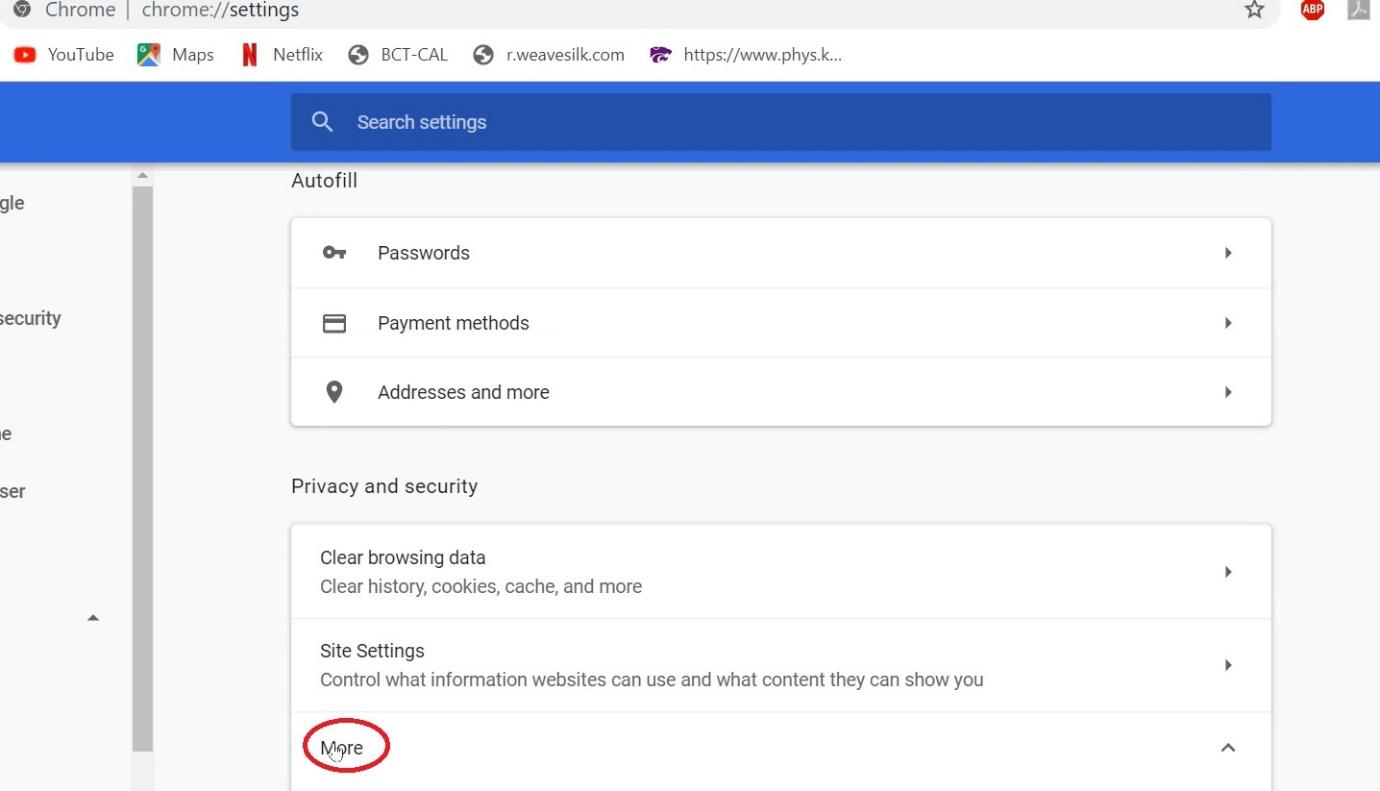
Again, go to advanced settings within your Chrome browser and search for a tab for “Privacy and Security,” and click “more” below. Under this menu, uncheck Prefetch resources to load pages quickly.
This will eventually save you a lot of RAM and disk space.

Use Chrome extensions to Reduce Memory leaks
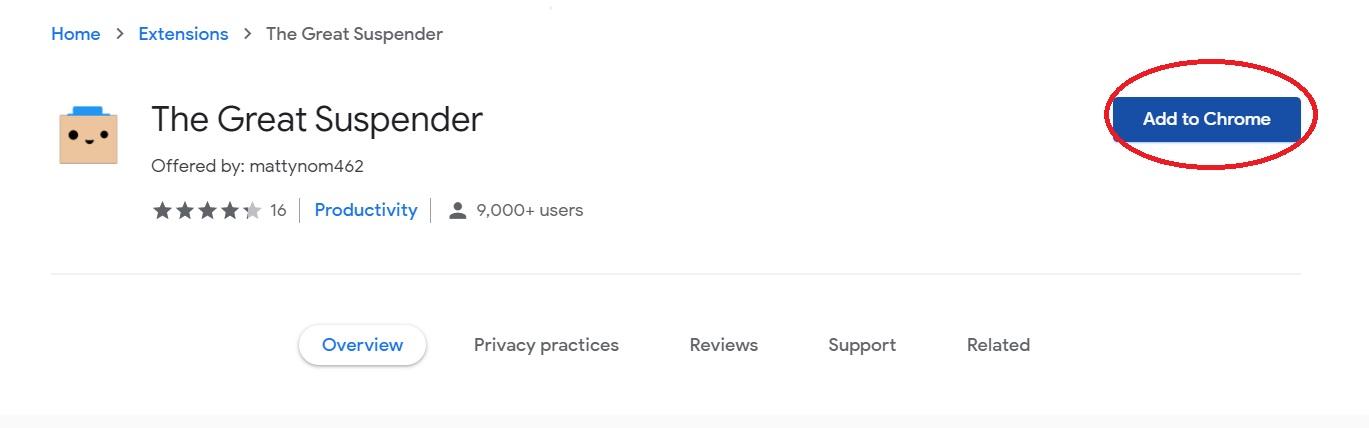
If you want further ease of mind, then we highly recommend the use of the Chrome extension “The Great Suspender“.
It will facilitate multitasks, if you don’t want to close different tabs but still looking for efficient ways to reduce RAM usage.
As the name suggests, this extension is great at regulating multiple tabs without putting much of the system’s burden. It will effectively determine which one is your current tab while suspending all others.
When you switch between various tabs, it will reload them at the exact state you left.
STEP 1: Install and activate this utility from Chrome Store
In the beginning, search “The Great Suspender chrome” in the Chrome browser and select the first link. Now choose the “Add to Chrome” option and wait some seconds for it to be installed.
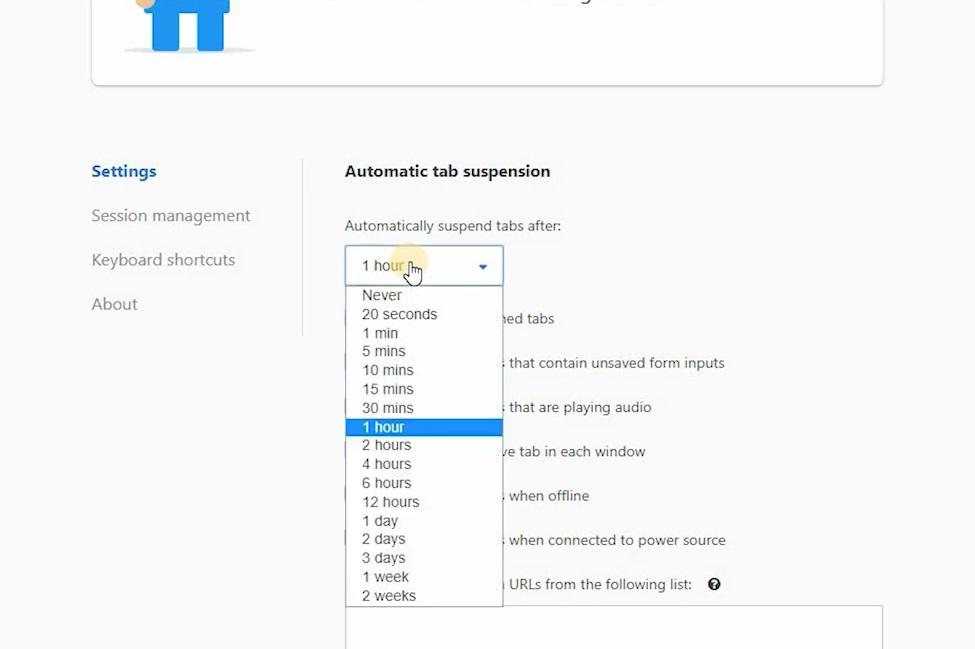
STEP 2: Tailor the suspension settings to your needs
Soon you will get the notification for completed installation. Note that you can customize its settings according to your preferences, one of which is suspension time. Anything between 5-20 minutes is ideal, but you can set it to your will and browsing goals.
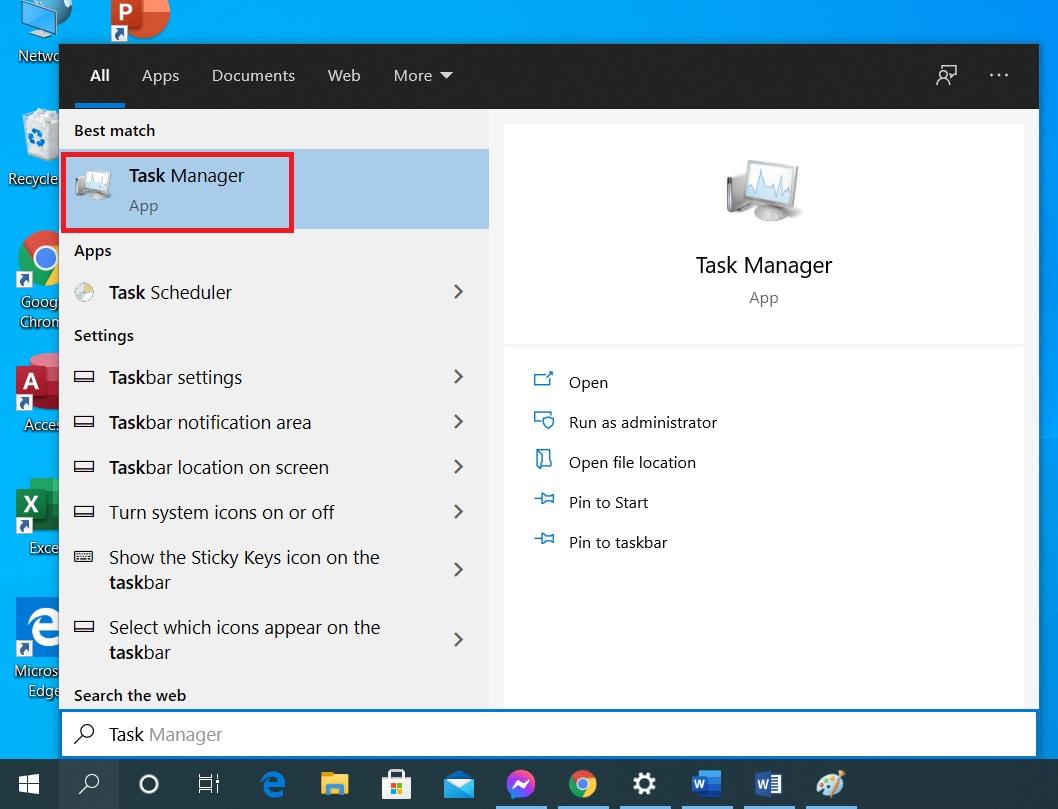
STEP 3: Check memory utilization in Window’s Task manager
Enter your task manager by finding it in the window’s search bar. You will find that your current Chrome browser’s memory exertion will be dramatically reduced, making your computer run much smoother.
ADDITIONAL TIPS
- Make sure that your Google Chrome is up to date for optimal performance
- Find the hardware acceleration option within Chrome settings and disable it.
- Delete cache, history, cookies, and other unwanted files from your Chrome.
- Try to use the Chrome Cleanup Tool and make sure no malware is incorporated into your system
- Completely reset Chrome browser after syncing your data
FINAL WORDS
So, these were the best ways to fix chrome memory leaks that reduce memory usage. I am entirely sure after implementing at least some of these methods; you will see instant results.
If you are still uncertain about these methods, then it’s ideal for changing your browser.
Sure, Chrome has a large chunk of market share and billions prefer it, but dozens of other options are available like Firefox, which is lightweight and consume much less system memory to operate.
Of course, it won’t have some juicy features like speedier connectivity and over-the-roof optimization but other than that; it’s good to go!