
Table of Contents
- How to run Kali Linux on android without rooting
- Install Kali Linux on Android using Termux without root
- Step-by-Step Guide to install Kali Linux using AnLinux
- How to Run “kali Linux full version” on android
- Why is Python So Popular in the Tech Space?
- How do you root an Android phone to install Kali Linux?
- Best Practices While Using Kali On Android
- FAQs
It’s possible to run kali Linux on Android mobile with rooting. In fact, there is a Mobile version of Kali OS that you can get from their official website.
However, the official version of kali Linux does not work with mobile that is not rooted. Therefore, follow this method to install kali Linux on your device without rooting it. It will require downloading some extra apps like Froid or Anlinux to create a virtual environment.
This guide will cover everything you need to know, at the end of this article you can replace your Android OS with Kali Linux OS.
This method is so unofficial, so follow these steps at your own risk. However, we have tried this, and it worked for us.
How to run Kali Linux on android without rooting
Video tutorial:
Requirements to install kali Linux on android
First of all, you will need the following apps; download them first from the google playstore.
- Termux (Linux command terminal for android)
- AnLinux (to run Linux without rooting)
- VNC reviewer (for full desktop version)
- Termux: Termux is a terminal emulator and Linux environment app for Android that allows you to run command-line utilities and packages on your device.
With Termux, you can access a full Linux command line environment on your Android device, including tools like Python, Ruby, Node.js, and Git.
Termux is often used by developers, hackers, and security professionals to perform various tasks on their Android devices. - AnLinux: AnLinux is an app that allows you to install and run Linux distributions on your Android device without rooting it. AnLinux provides a simple and easy-to-use interface for installing various Linux distributions such as Ubuntu, Debian, Arch Linux, and Kali Linux.
AnLinux works by creating a Linux environment inside a container, which can be accessed via a terminal emulator or a VNC viewer. - VNC Viewer: VNC Viewer is a remote desktop app that allows you to access and control remote computers or servers from your Android device.
VNC stands for Virtual Network Computing, and it works by transmitting the graphical desktop of a remote computer over a network connection to your local device.
With VNC Viewer, you can connect to a Linux environment running on your Android device and access it remotely using a graphical interface.
Storage and Data Required
- An Android device with at least 2 GB of RAM and 8 GB of storage space
- A VNC viewer app for remote desktop access
- AnLinux or Termux app installed on the device
To install Kali Linux, a minimum of 8 GB of free space and up to 3 GB of data will be required.
Install Kali Linux on Android using Termux without root
Step 1: Download and install the Termux app from the Google Play Store. Alternatively, you can download and install apk file from GitHub. Another way to install Termux is F-Droid store. After installing Termux, run apt update to update any dependencies and run apt upgrade to upgrade the software.

Step 2: Once installed, open the Termux app and type the following command to install the required dependencies:
pkg install wget curl prootThis command will install the necessary tools to download and run Kali Linux on your Android device.
Step 3: Next, download the Kali Linux image for Termux by running the following command:
curl -LO https://raw.githubusercontent.com/Hax4us/Nethunter-In-Termux/master/kalinethunterStep 4: After the download is complete, run the following command to make the script executable:
chmod +x kalinethunterStep 5: Run the script by typing the following command:
./kalinethunter 
This will start the installation process for Kali Linux on your Android device.
During the installation process, you will be prompted to enter a password for the root user of Kali Linux. Choose a strong password and remember it.
Step 6: Once the installation is complete, start Kali Linux by running the following command:
./startkali.sh This will start Kali Linux in a new terminal window.
Step 7: Now open https://store.nethunter.com/en, and download and install the store app.

Step 8: Open the application and search for NetHunter Kex and click download and install NetHunter Kex.

Step 9: Update the security setting to allow the installation from this source.


After completing the installation, search for the Kex application and open it. This will launch Kali Linux on your Android device, allowing you to run various tools and utilities.

Although running Kali Linux on Android without rooting is not officially supported by Offensive Security, the creators of Kali Linux.
Step-by-Step Guide to install Kali Linux using AnLinux
Step 1- Open AnLinux app
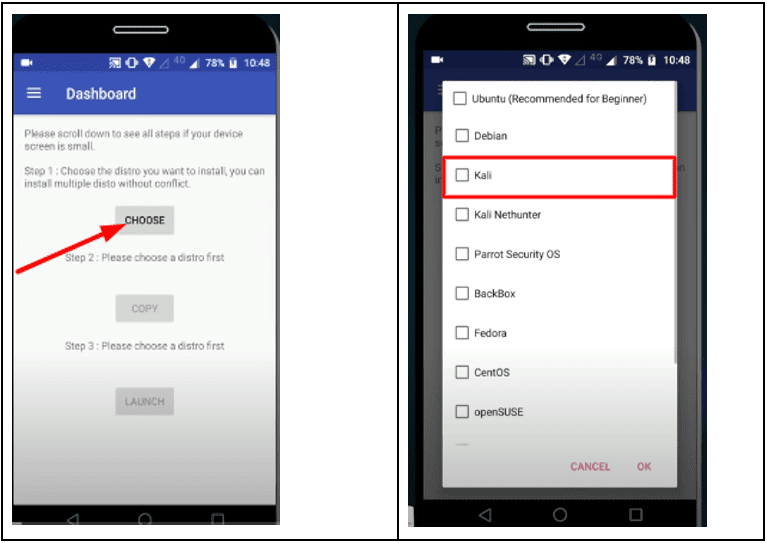
Once you open Anlinux, click on>Choose> tick mark, Kali.
Step-1.1- Copy the command from Anlinux

As shown in the image “a command,” simply copy this and now open the Termux app. This command will let you install the Kali Linux latest 2020.1 CUI version on your phone.
This method does not involve any graphical interface. It will be like using kali Linux in a terminal by commands.
Step 2- Open The Termux App and paste.
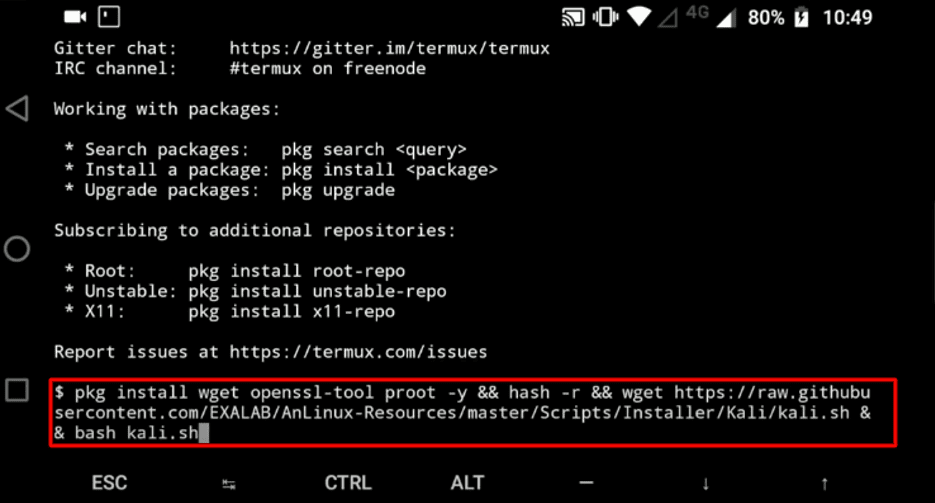
After you paste the command, an automatic process will occur and install the Kali Linux distro’s essential packages. Wait for its completion. And yes, “HIt Enter after pasting every command.”
Step 2.1- Start Kali Linux (CUI version)
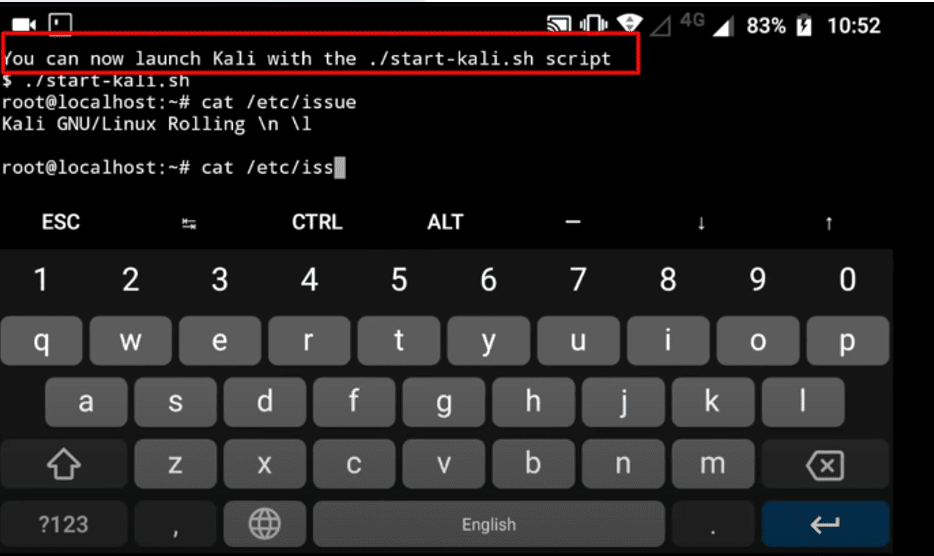
The Kali Linux CUI has been installed and is ready to use.
We will show you how to use the full version of Kali Linux, although, at this stage, the kali Linux terminal commands are ready to execute” ./start-kali.sh,” and the terminal will open.
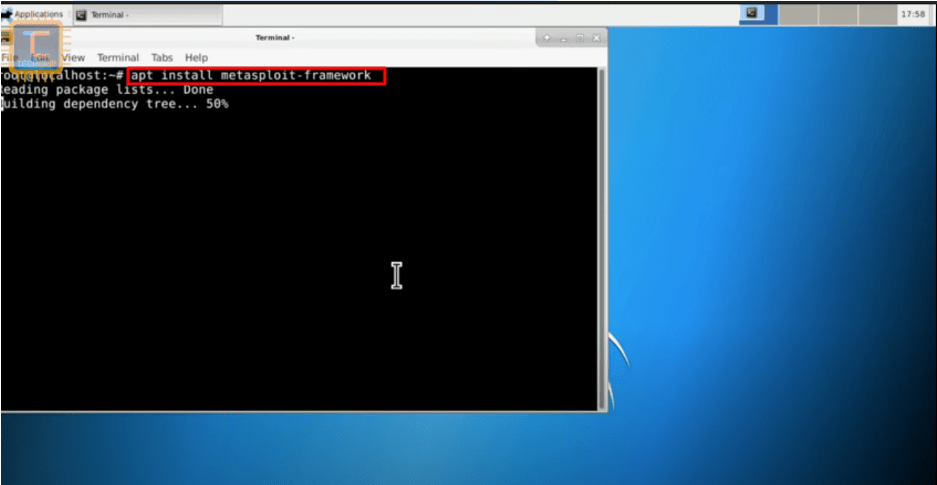
Step 2.2- Install Packages
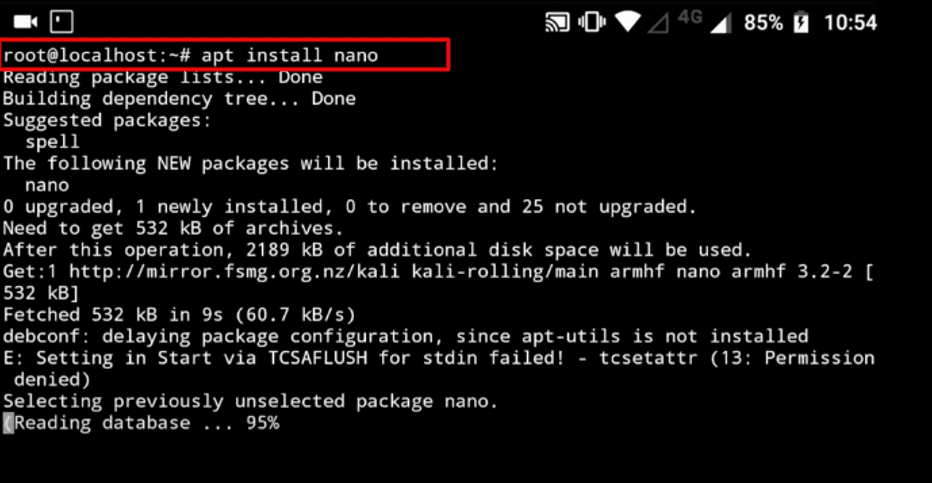
To Install packages in the terminal, use the apt command as the image shows the command “ apt install nano.” After executing this command, it will install the nano, a kali Linux package used for ethical hacking.
You can see we have executed a Kali Linux package using mobile. There are many other packages you should execute because by default Kali Linux does not give any package. For this reason, you may need this list of kali Linux packages.
How to Run “kali Linux full version” on android
Follow the steps to run the Kali Linux in GUI mode on your Mobile. it’s like an operating system.
Step one- Open the AnLinux app again.
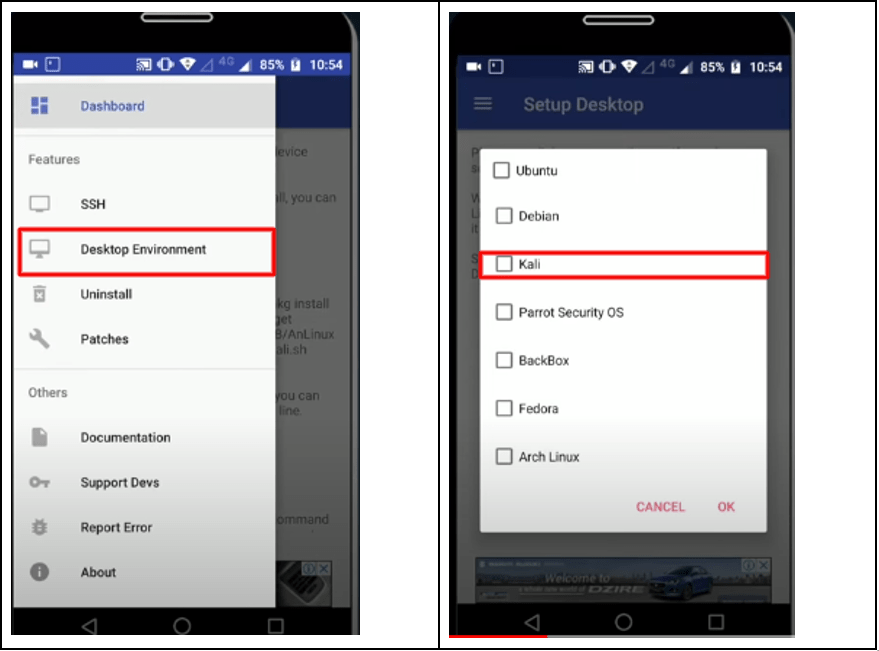
To run the full version of Kali Linux on your Mobile, you need to step back and open AnLinux, then go to the dashboard>Desktop Environment>Kali. Then choose any GUI desktop environment. It’ll appear something like this.
Step two- Tick Mark Kali Linux

There are different GUI modes for PC, but in android, the number of GUI environments is limited. By the way. Xfce4 is recommended.
Step three- Copy the “VNC script.”
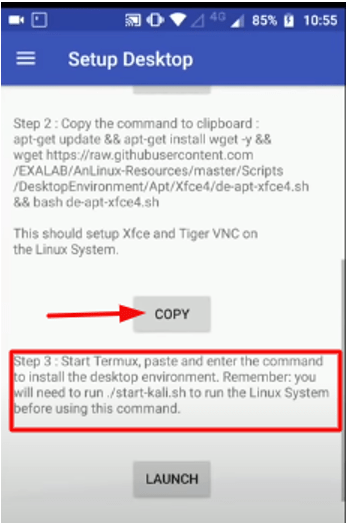
Copy the code once again, and paste it on the Linux terminal (Termux) but, remember; You must have opened the Kali Linux terminal by executing this command ./sh
Step Four- Paste it in the Termux.
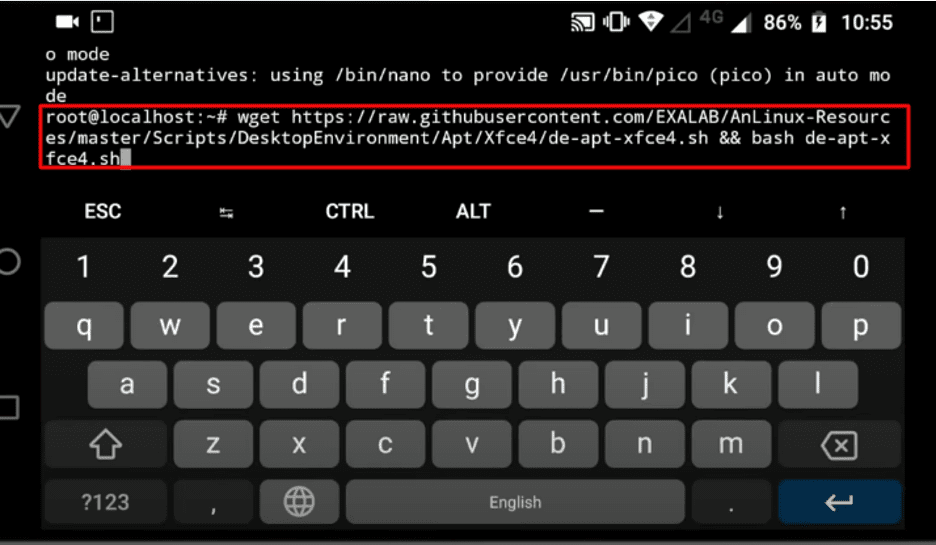
After executing this script, you will be asked for a password and local hostname. after providing the password as you wish and naming your local host, you can connect it with the VNC viewer (our third application).
Moreover, you will be allowed to connect your Kali Linux with a VNC viewer using a Local Host connection.
Step Five- Name your localhost, and give a password.
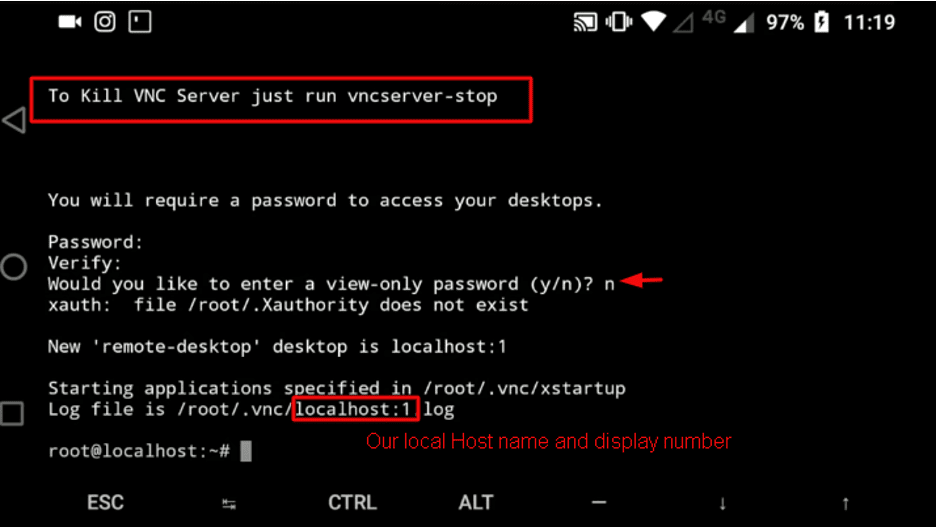
The Image shows, Our VNC server has been started, and we named it localhost1. To Stop the VNC server, use the command “vncserver-stop,” and to start again, use the command “vncserver-start.”
Note; Before you open the VNC viewer app, you must have Run the VNC server first. In this image, it is already running. So, we can now open the VNC viewer app.
Step six- Open the VNC viewer app and follow these steps.
- Open VNC viewer
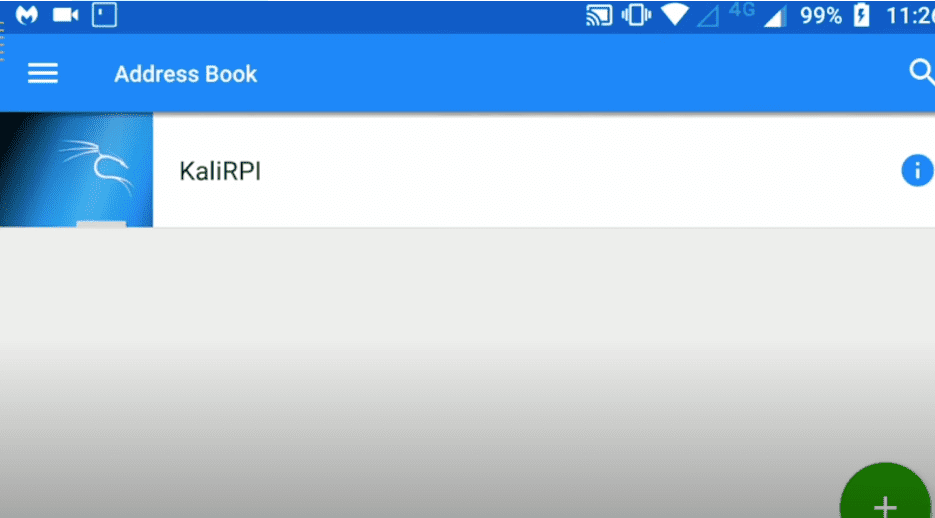
- Write your Local Server name.
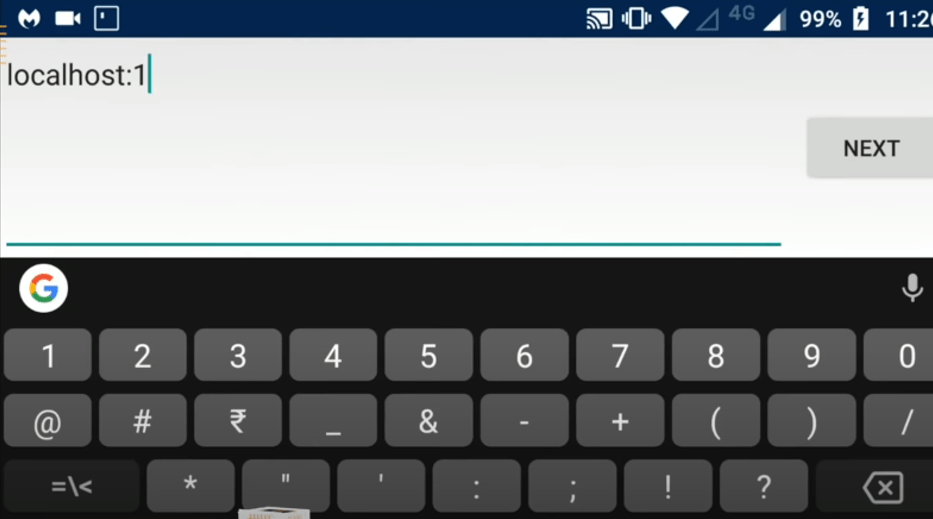
This the Localhost number that we have written when executing Desktop Environment Script on Kali Linux
- Name your VNC review server

After you write to the localhost, it will prompt and ask you to give it a name. Name it any randomly you want.
- Give the password
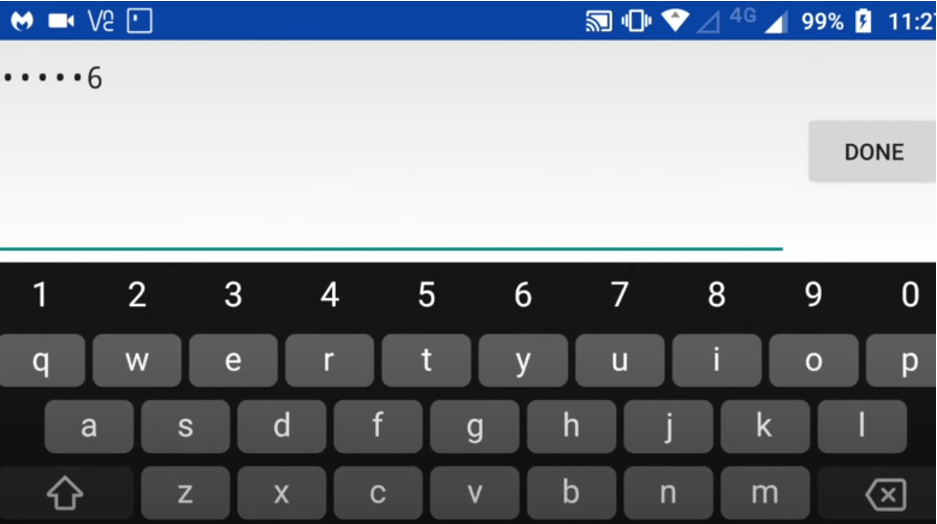
Now it is time to give the password you have provided when executing the VNC script on Kali Linux.
- Finish kali Linux full version should run now.
You can see the image it is working; if you follow these steps too… you will get the kali Linux full version working on your android or any mobile phone.
If you feel any difficulties, you can watch this Youtube tutorial.
Why is Python So Popular in the Tech Space?
Kali, being a specialized Linux distribution system, is used in a plethora of applications that range from digital forensics to security auditing. Let’s discuss some of the prominent reasons.
1. Analyzing Network Security
Kali Linux is a game-changer when it comes to evaluating network and system security. This way, it identifies weaknesses before malicious entities exploit them completely.
2. General Testing
Kali Linux is also equipped with a comprehensive suite of tools specifically designed for assessing systems. For this particular reason, it is generally recommended by cybersecurity professionals, ethical hackers and enthusiasts.
3. Skills Development and Learning
Similarly, Kali Linux on Android can serve as a great educational tool. Users can get hands-on experience on different aspects of hacking as well as a general understanding of stress testing and spoofing.
Kali Linux on Android Vs Desktop
Installing Kali Linux on Android Termux brings certain advantages over using it on a plain desktop. Here are some of the notable ones:
· Easily Accessible
Android is still in demand, so Kali Linux can be accessible to a wider audience. This way it facilitates students and professionals in the use of security tools without the need for significant investment.
· Portable Platform
On Android, the need for dedicated hardware or stationary systems is little to none. Users can carry out their security assessments and tests on the go!
· Resource Efficient
Android devices especially the high-end models come provided with enough computing power to leverage Kali Linux. As a user, this means that you can archive security tests and assessments without compromising performance.
How do you root an Android phone to install Kali Linux?
Now, rooting your phone can be equally rewarding, especially if you want to use the full power of Kali NetHunter. This could help you attack Wifi networks or run HID attacks. With that said, let’s discuss how to root your Android phone in preparation for installing programs such as Kali NetHunter.
STEP 1: Open the Google Play store and download an app that goes by the name of “Root Checker”. Once installed, use its root checker functionality to find whether your device is rooted. If it isn’t, then proceed to the next step.

STEP 2: Open any browser (like Chrome) and search for the “iRoot” APK. Then, download the application by saving the APK file. If the installation process is hindered, navigate to “settings” and enable “installation of unknown sources”.

Note: If you encounter a warning from Play Protect, simply click “install anyways” from the dropdown.
STEP 3: Now open the iRoot app and get root access from a single tap!

STEP 4: As an alternative, you can also try the “Kingroot apk” before you opt for the Kali Nethunter rooted version.

STEP 5: Again open the “Root Checker” application and confirm the root access. This time, you will notice that your device is now fully rooted.

By following these simple steps, you two can root your Android phone and enjoy the full power of Kali Linux.
Best Practices While Using Kali On Android

To use Kali in a secure environment, here are a couple of tips that everyone should adhere to:
1. Use Strong Encryptions
Make sure that you use unique passwords for the Kali Linux environment and the Android device itself to protect yourself from unauthorized access.
2. Apply Regular Updates
Regularly updating Kali Linux allows you to patch errors and mitigate potential security risks. This is why it’s so crucial to apply these changes released by Kali Linux developers.
3. Configure Firewall
It should be mandatory to use firewalls within Android and Kali Linux as it keeps a tab on incoming and outgoing traffic. Avoiding unprotected or public Wifi can also minimize the risk of data interception.
4. Keep Your Backup in check
Keeping backups is a great way to recover your data in case of system failures, errors, or security breaches.
5. Employ Monitoring Tools
Using IDS tools in Kali can help you identify unusual activity or potential breaches early on.
FAQs
What are the risks of installing Kali Linux on Android?
Although Android devices are generally accepted for Kali Linux, there are certain risks that every user should be aware of. These can be anything from device instability (freezes/crashes), damaged warranty, and even “bricking”.
Can Kali Linux on Android fully replace a desktop installation?
Unfortunately, Android doesn’t entirely substitute a full-blown desktop setup, mainly due to hardware and performance constraints.
How can one uninstall Kali Linux from an Android device?
There are several ways you could remove Kali Linux from Android; however, the one that we personally recommend is performing a factory reset.