
Table of Contents
Windows and Linux can reside in same computer and will never bother each other. In this step by step guide, we will show how to install MX Linux and running it along with Windows 10.
Download the MX Linux image:
Download the image from their official website. Go to their website and click on “Direct Repo’ button to download the files directly from the website. You can also use Torrents to download the file from Torrent. I prefer torrent because its much easier and faster. The current version as of now is MX-19.2

64-bit works with most new PC, but download 32-bit if you have old PC that supports 32-bit.
Also read: How to install Kali Linux on Android
Create installation disk of MX Linux
Once you have donwloaded the iso file from direct download or from torrent. You can now create live CD or live USB.
LiveCD / LiveUSB is an operating system recorded on a disk or flash drive, respectively, which does not require installation on a hard drive for its operation. Most modern Linux distributions are distributed like this, and MX Linux is no exception.
After turning on the computer, the system from the LiveCD is loaded into RAM and works like a normal OS. Then you can already install it on a hard drive or SSD (depending on what you have installed).
You can leverage UnetBootin to create live CD or Live USB for MX Linux.
install UNetbootin from terminal
- Add the repository
sudo add-apt-repository ppa:gezakovacs/ppa
- Run Update
sudo apt-get update
- Install Unebootin
sudo apt-get install unetbootin
When the Live disk is ready, go into BIOS and change the order of the machine boot from the hard drive to the live disk.
BIOS interface can differ from computer to computer and hence the instructions would also vary. You have to be very careful while making any change to the BIOS. Make sure you search through the net for the instructions to setup your PC BIOS.
Run MX Linux from live cD
After completing all the above steps, you can start your PC with MX Linux and get to the boot menu.

It displays several options, select first option that says “MX-192. x64..”
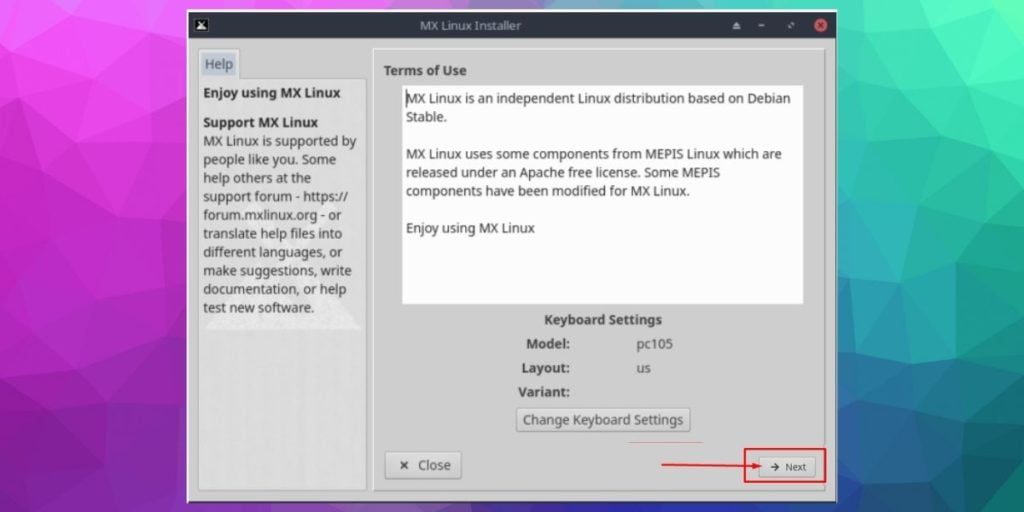
It shows welcome screen with developers note. You can now take a look around the system – it is fully operational. Close the welcome screen and launch the installer utility from the desktop.
A new Window will appear where you can change the keyboard settings. Keep the default option and click Next to process to next step.
Disk preparation (BIOS MBR)
Now, we will prepare (create partitions) the hard drive for installing MX Linux along Windows 10. In this section, I will show you how to partition the drive for computers with BIOS MBR.
Launch GParted
Select GParted program from the installer window. Now select “Run partition tool” from “Rearrange disk partition” to create partition on the hard disk.
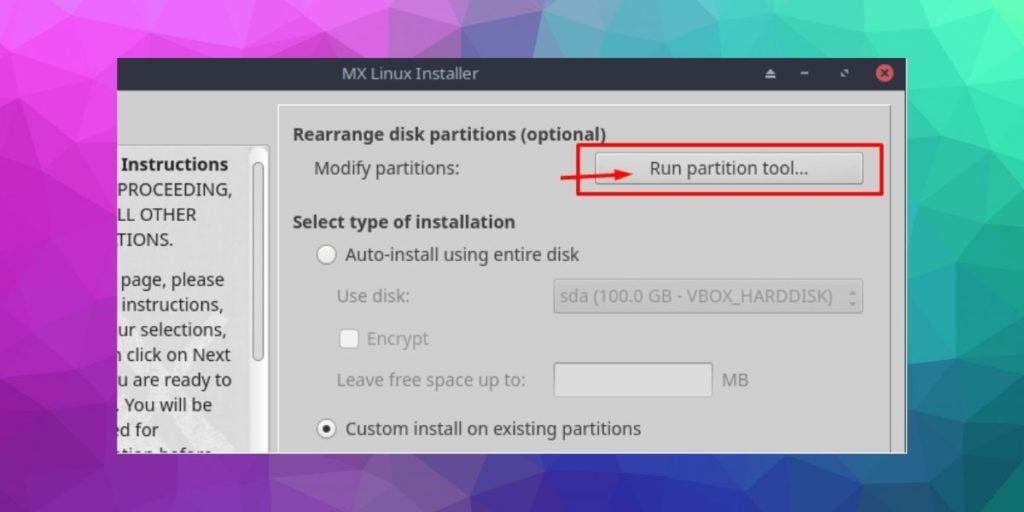
You can create multiple partition to keep each operation system in separate partition. Make sure to format the partition in NTFS. Here we will create Three partitions, one for Windows 10 and second for MX Linux.
Small piece of advice, although its pretty easy to use partition utility, but make sure you know what you are doing. You could loss all data on the drive if you don’t pay attention. I always create a backup of my drive before I run such type of utility, and recommend you same.
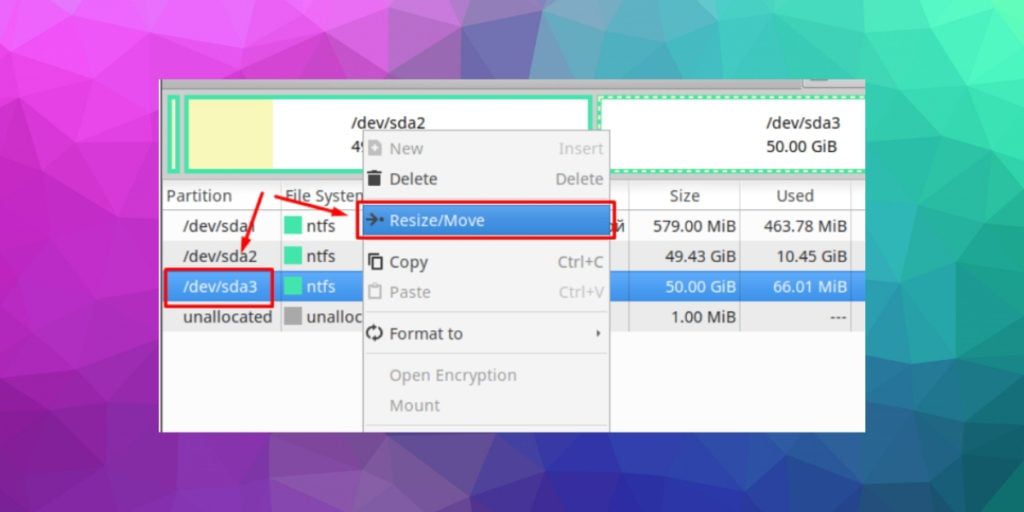
Now that we have create partitions, we can now allocate space to our MX Linux operating system. We will select sd3 for MX Linux. To do that, right click on /dev/sda3 and select Resize/Move from the dropdown.
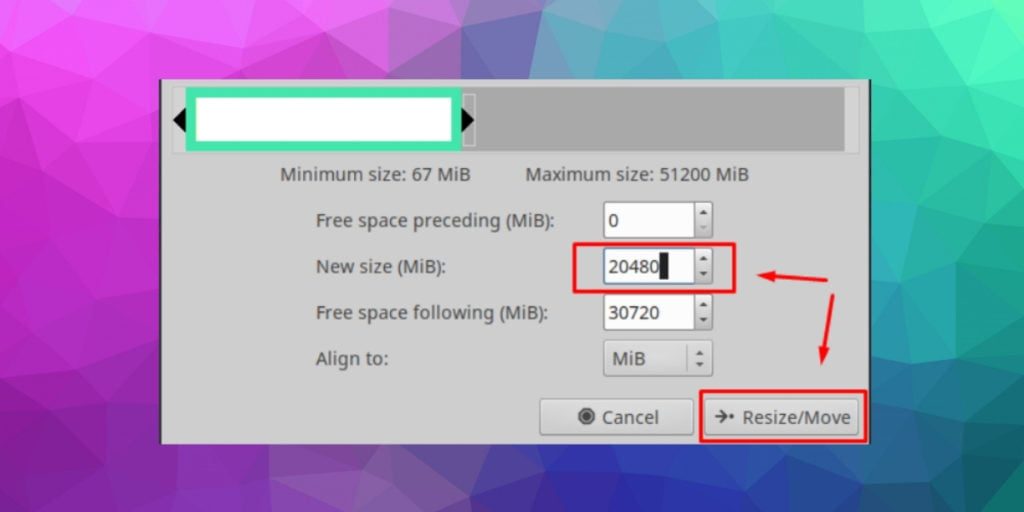
Now you can resize your drive to new size. 20 GB is more than enough for MX Linux. After entering the size in MB in New Size text box, select Resize/Move button.
Bootloader configuration
Once the partition is created and allocated for MX Linux, you can start the installation. Now you need to specify where to install the GRUB bootloader. Without changing anything, click Next.
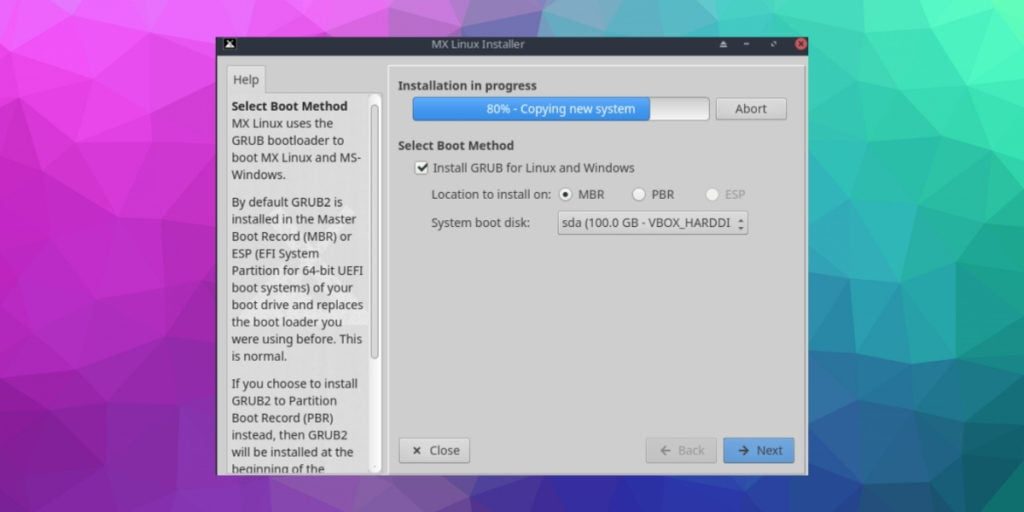
In the UEFI GPT option, everything will remain same, except the installation location changes. But the installer will take care of that.
Setup the computer name in MX Linux
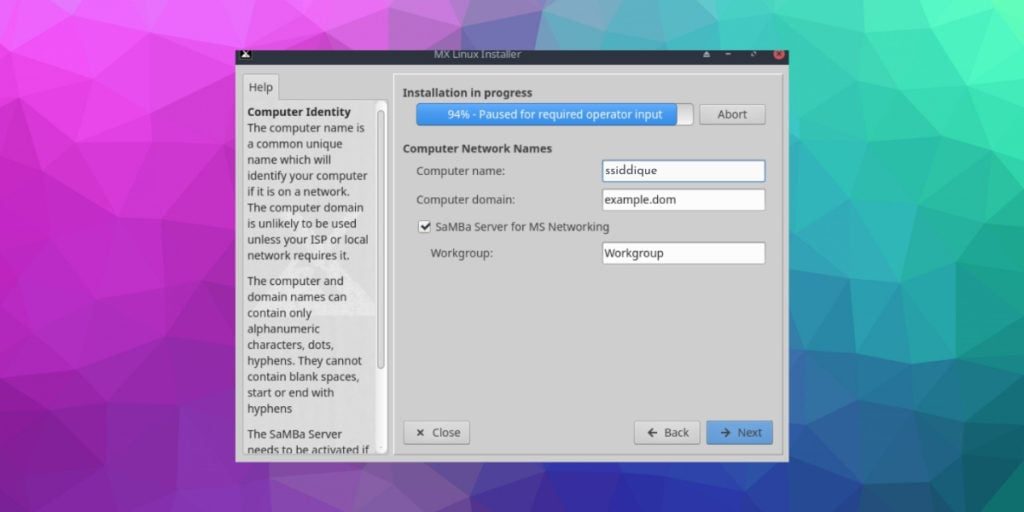
Now you are asked to name your computer, workgroup and computer domain. I changed only the computer name and leave rest as it is and click Next.
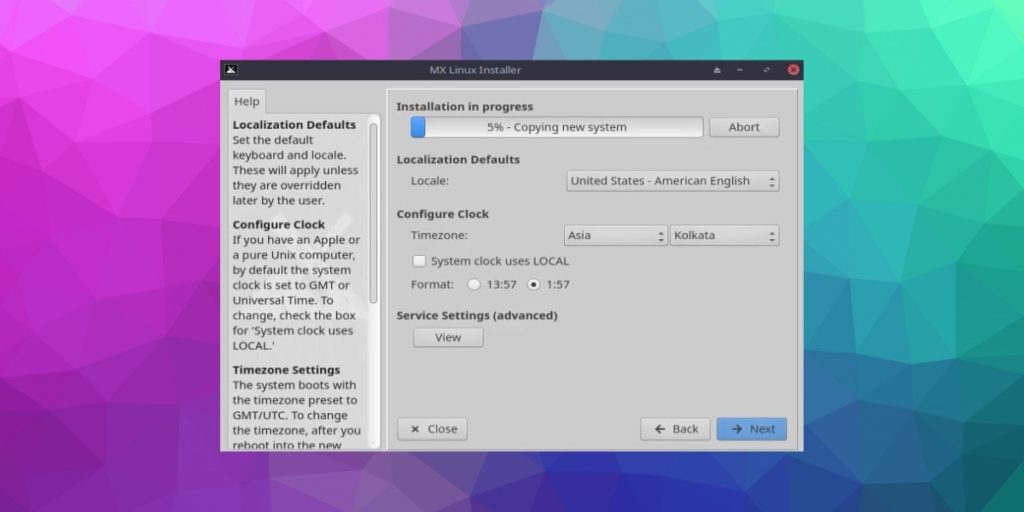
Configure Locale and clock settings in MX Linux
Set the Clock and Click Next
Create user for MX Linux

In this step, we create root and non non root users. Enter the password for both. In this step you can enable autologin and save live desktop changes. Once done, click Next Now wait for installer to finish. Once done, click `Finish and wait for operating systerm to reboot. Now you can start Windows 10 installation on other partition.
