The very basic way to install visual code on your Chromebook is here.
What do you need to know to run visual code on Chromebook?
- Visual code does not work with ChromeOS, you just need to replace ChromeOS with Linux. Read this blog to install Linux on ChromeOS.
- Make sure your Chromebook has at least 2GB of RAM memory and some free storage.
- As Visual Studio Code is available and can run on Linux with ARM64 and ARMv7 CPUs, this implies Chromebooks with ARM chips are compatible with Visual Studio Code.
Also read: Installing python on Chromebook.
How do I install visual codes on Chromebook?
Step 1: Setting up the Visual Code
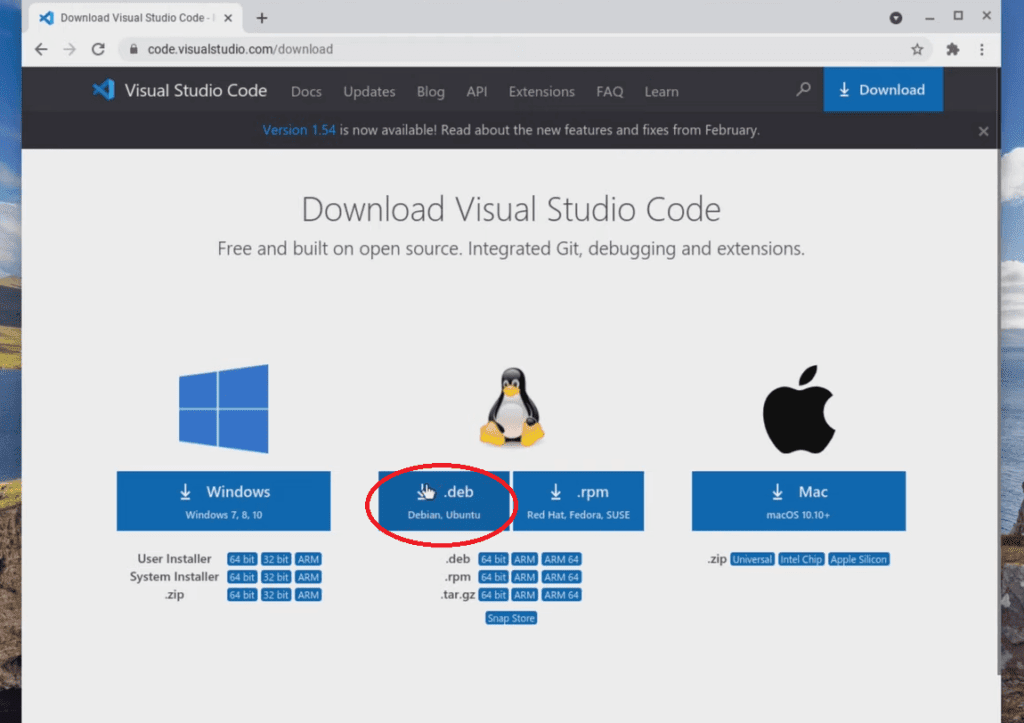
- Head over to the official site of Visual Studio by clicking here and clicking on the “.deb” option listed in the middle.
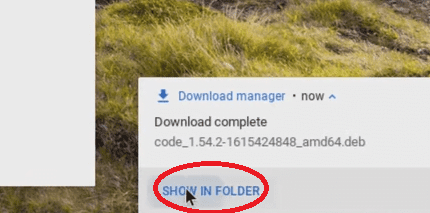
- The download will soon start, and once it’s over, open the download folder by selecting the bottom right box.
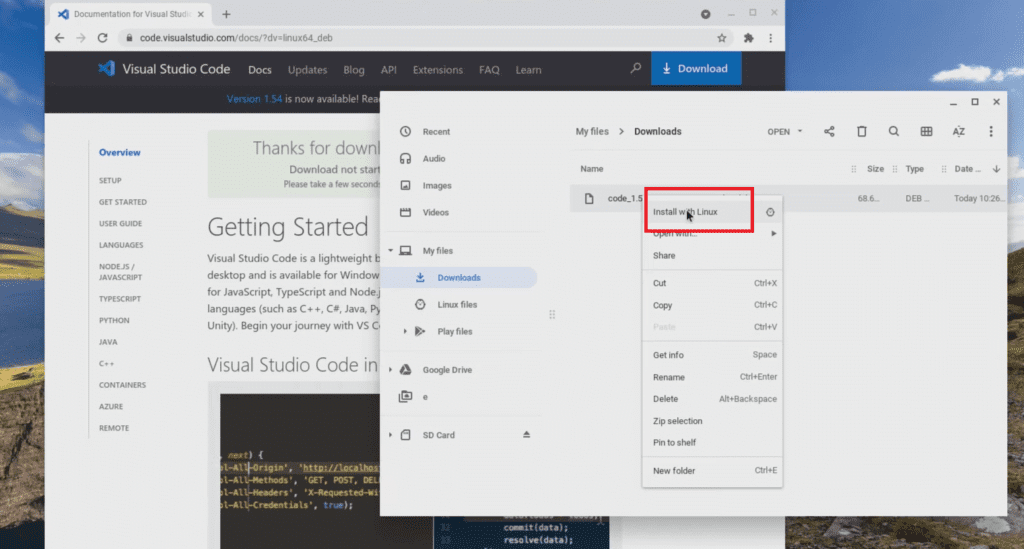
- Now, right-click the file and select *Open with Linux Beta* to allow the installation of Visual Studio. The progress can also be monitored at the bottom right corner.
Step 2: Applying the Python environment for Visual Studio
- Once the installation is complete, minimize the Visual Studio tab and open your Command Terminal. Type “Sudo apt-get update” & hit enter.
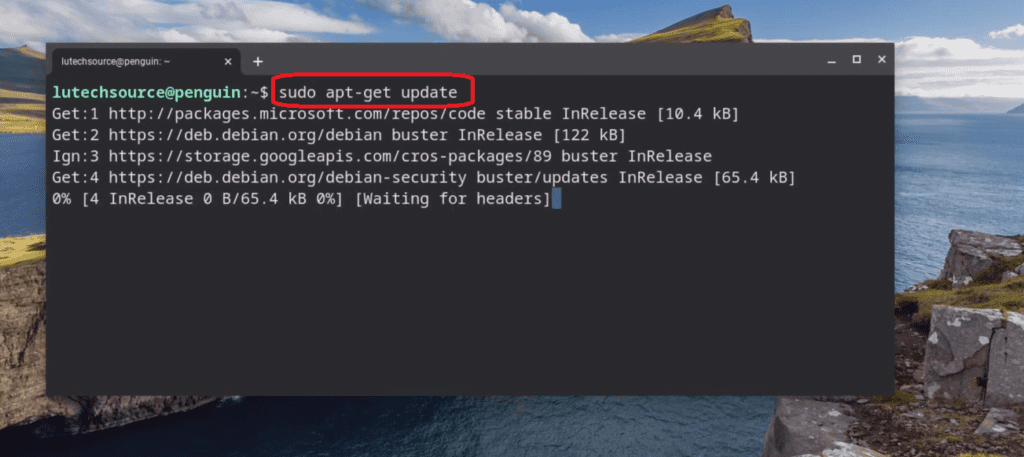
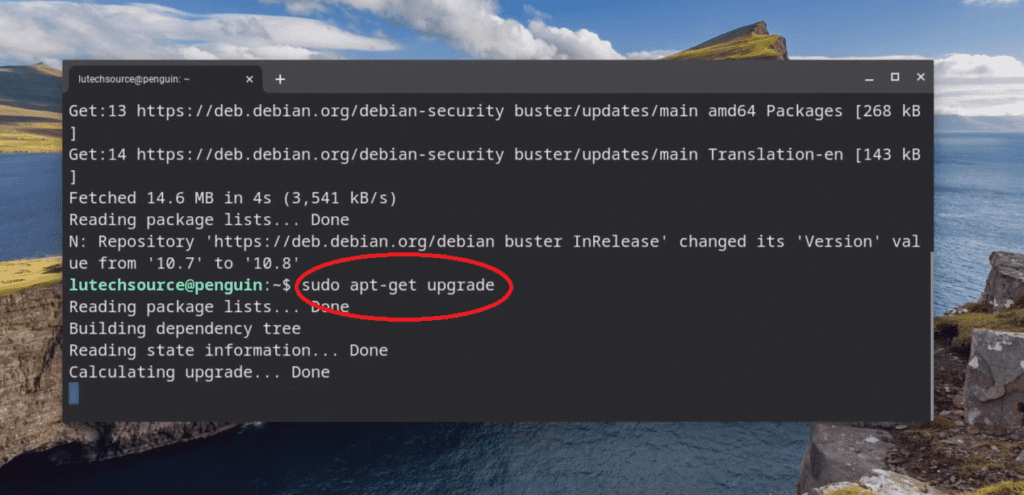
- After the command is executed, again type “sudo apt-get upgrade” and continue.
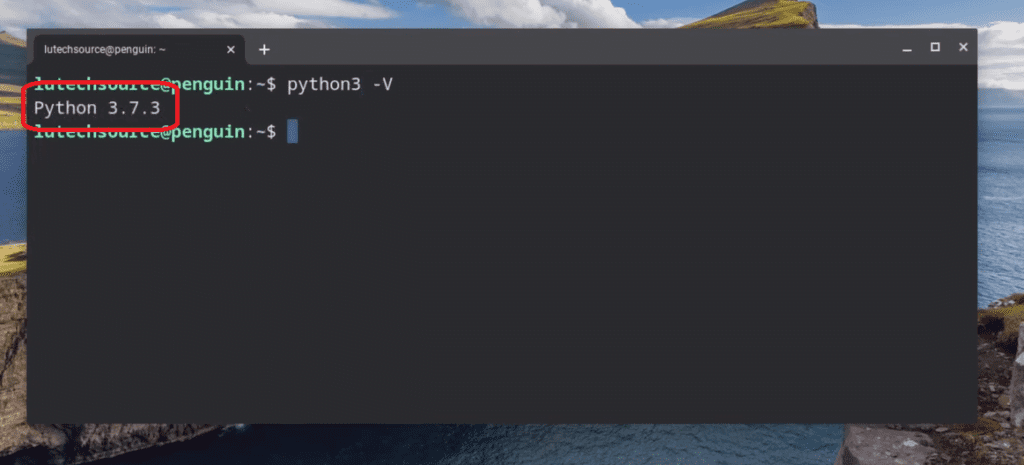
- Now to see whether Python is properly installed or not, write “python3 -V” in the command window. If you see a Python version displayed, then proceed next.
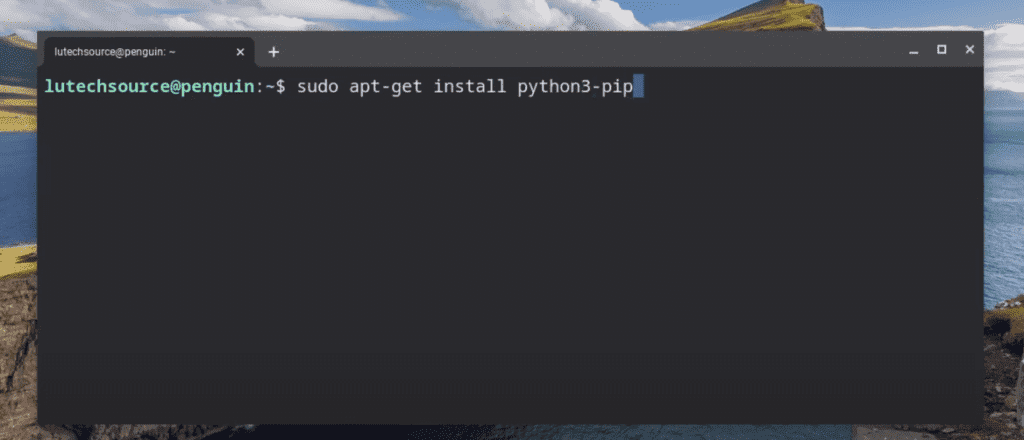
- In the following step, you need to install the Pip package manager (Type “sudo apt-get install python3-pip“. The purpose of this utility is to use third-party Python extensions on the go.
Step 3: VS Code Configuration via environment
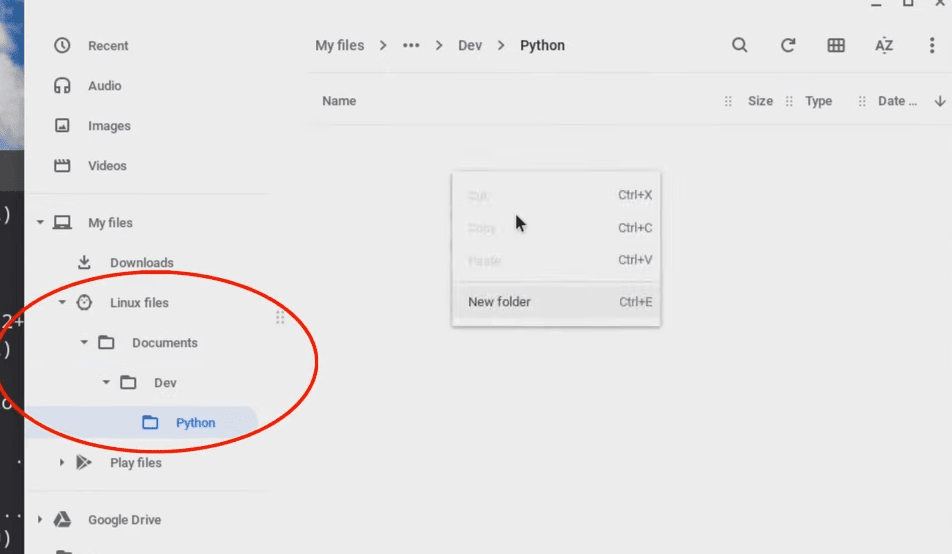
- Before you move any further, you need to create a folder within the Linux File location where the Python projects will be stored.
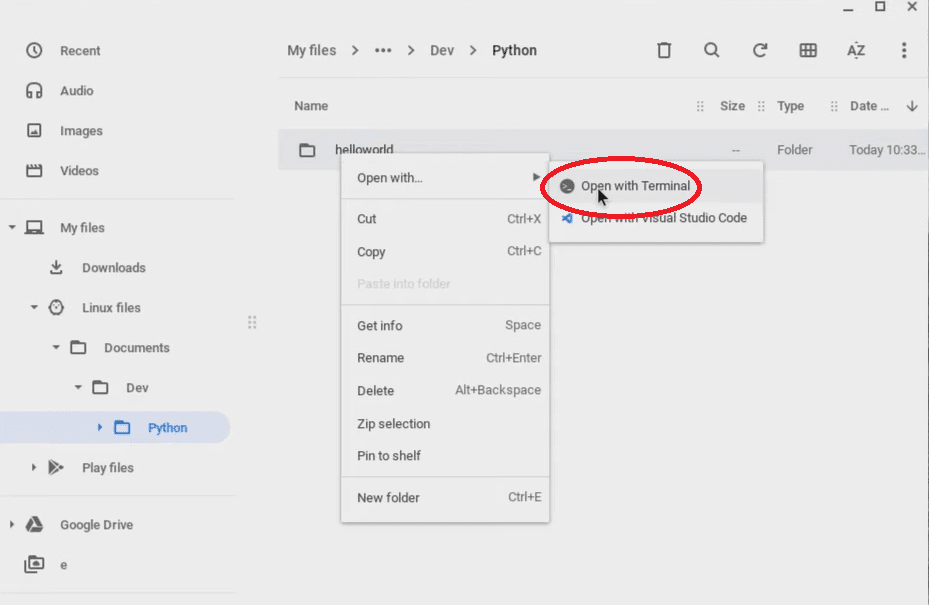
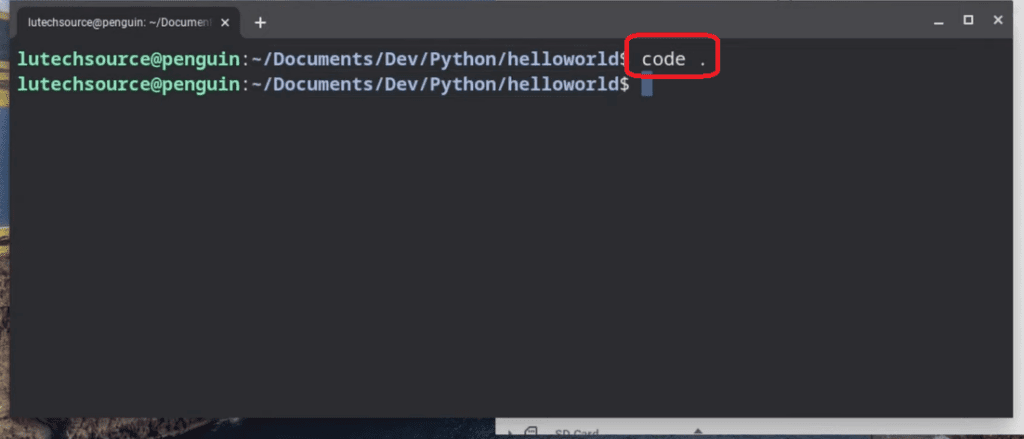
- Now, right-click the folder and scroll over to the Open with section, where you need to open it with the terminal. Another window will pop up in which you are going to input “Code .” This will automatically open the Visual Studio.
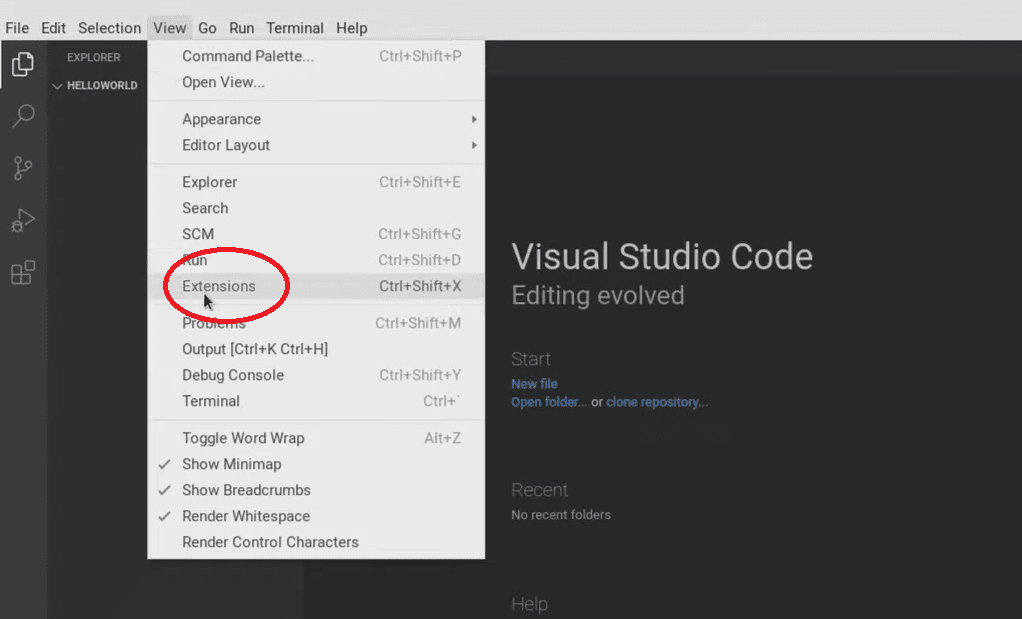
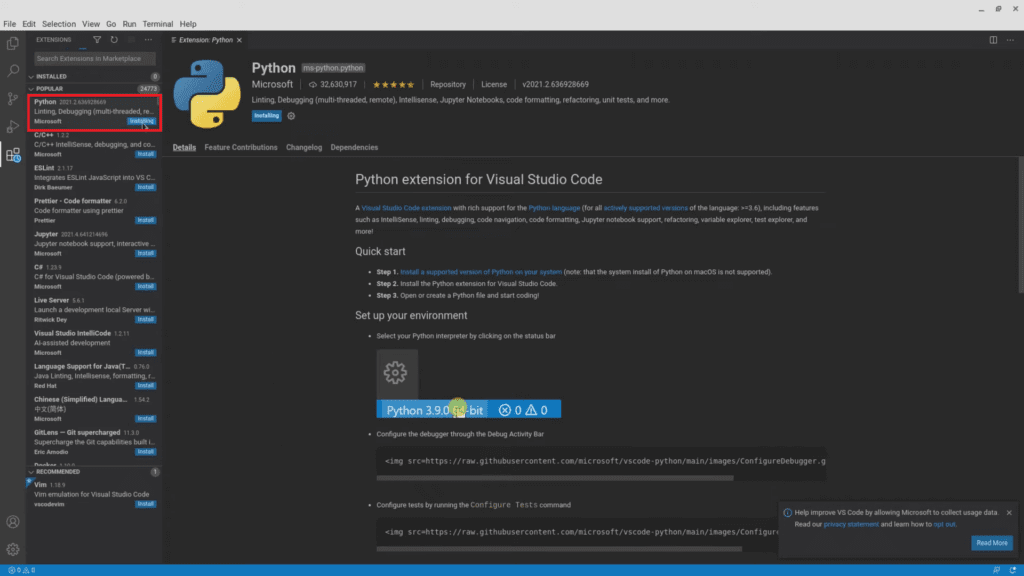
- Once that’s done, click on View and then Extension located at the top left corner. As the resource is displayed, select Python with Microsoft as the main publisher and hit install.
- The next step is to enable a Raw Python Interpreter. So again, click on View & then Command Pallet. Write “Python select interpreter” and select the following result in the subsequent box.
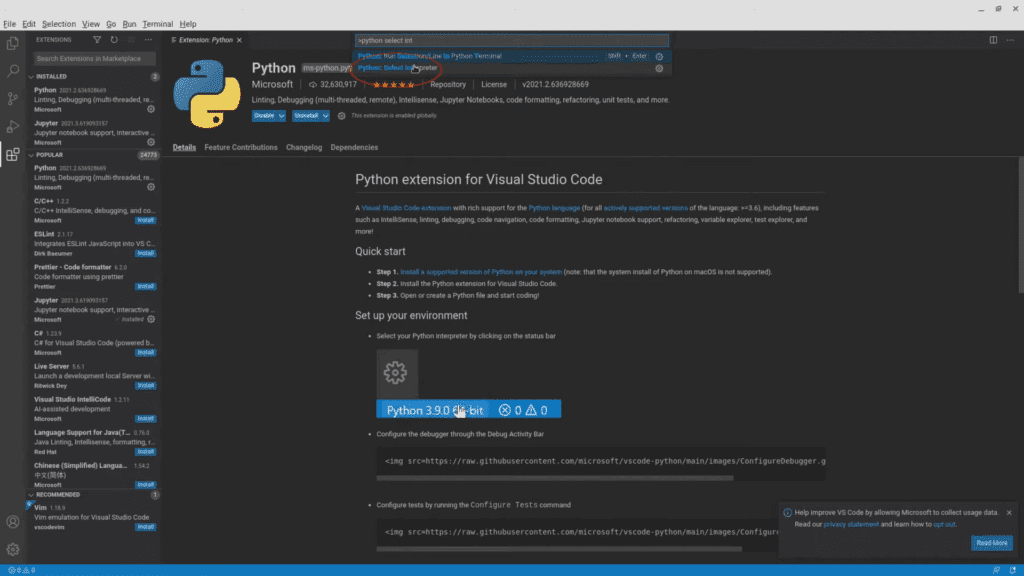
After that, the Python environment is ready to use. You can now start programming your project by heading over to the explorer section at the top.
... Read More